How To Install Artificial Grass
Read about how Easigrass professional artificial grass installation can transform your outdoor space

Artificial Grass Installation
The Easigrass™ artificial grass range is fully porous, UV-stabilised, and suitable for placement on soil, tarmac, concrete, and decking. The fully porous system is used for most outdoor artificial grass installations on top of a soil sub-base.
All our Easigrass™ installation teams are certified and highly trained, and are ready to transform garden lawns across South & Southern Africa. Rest assured, this is done with the utmost care for your property, and with a minimal amount of fuss, mess, or noise.
When it comes to laying an artificial lawn, you are assured of highly skilled professional installers and designers with Easigrass™.
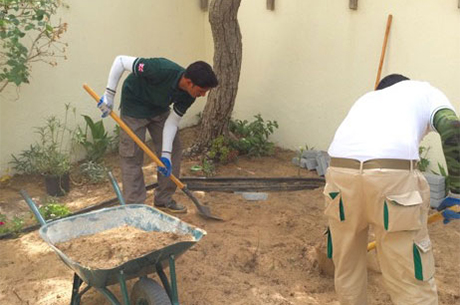
Step 1: Preparing The Ground For a Perfect Lawn
Step 2: Prepare the Ground with Watering and Compaction
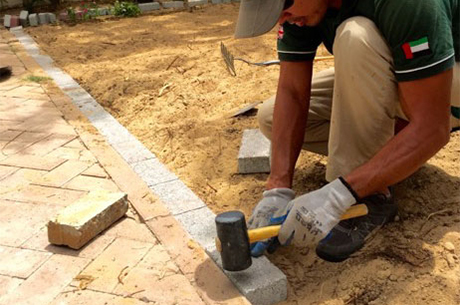
Step 3: Install Artificial Grass Edging
At this point during the artificial grass installation, you may be a little confused because it looks like we’re installing an extra edge to your new lawn. Technically, we are, but it’s an edge no one will be able to see! Temperatures in South Africa can fluctuate significantly between day and night, causing the grass to expand and contract. Without proper installation techniques, artificial grass can ripple, leaving your lawn looking unfinished. To prevent this, we securely fix the edges, keeping your lawn in place and looking flawless.
*Please note that installation times during this stage may vary.
Step 4: Geo-textile Layer
Once the earth is compacted and the edging is secure, we fit a heavy-duty geo-textile membrane to act as a weed barrier. This acts like a thin barrier, preventing any surviving organic matter from growing through your artificial grass. This thin paper sheet also acts as a stabiliers, separating the compacted earth from the aggregate base, which is the next step in our process.
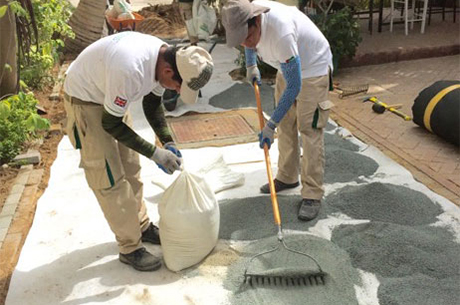
Step 5: The Base Material
The next step is to introduce a crushed rock aggregate to form the new base of your lawn. This material is easily compactable, creating a solid, stable base that’s perfect for a flawless finish. The aggregate is spread over the geo-textile membrane and carefully levelled by hand to create a perfectly flat, even surface.

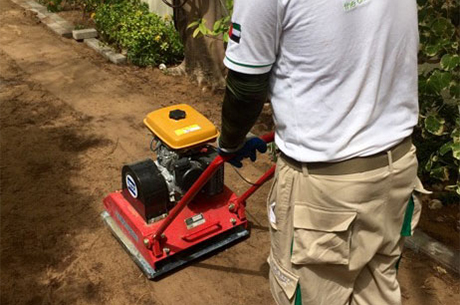
Step 6: Compact the New Aggregate Base
Once the base has been levelled by hand and watered thoroughly, we compact it over and over again in order to get the perfect finish. Once it has received enough attention, you’ll find that it is incredibly even and will feel extremely solid whilst still remaining porous.
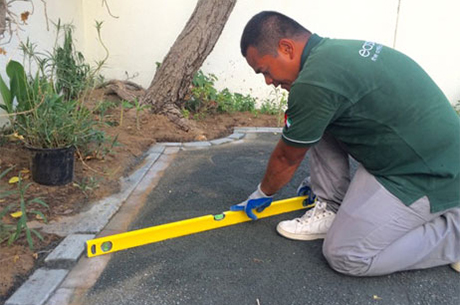
Step 7: Check The New Base Levels
We use a straight edge to check the base levels, ensuring the artificial grass is laid on a perfectly flat and even surface.
Step 8: Supply and Fit your Chosen Easigrass™.
Now comes the fun part, your Easigrass artificial grass is ready to go down. First, we work out the best direction for the pile of the grass to face as all fake grass products will tend to lean a fraction in one direction or the other. Some products will do this more than others, and some you can hardly even tell, but all products will have a direction. The area where your artificial grass will be installed is assessed to minimise visible seams and ensure the best overall appearance. Once the uncut rolls are placed, we will then roughly cut the grass so it’s easier to handle. We make sure to trim your artificial grass to the perfect size, making sure it’s the perfect fit for the new base and edging.
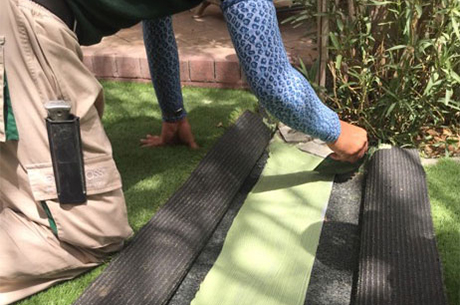
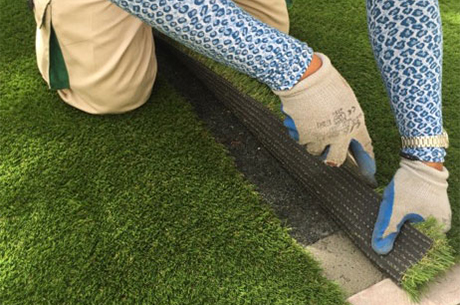
Step 9: Gluing and Preparing The Seams
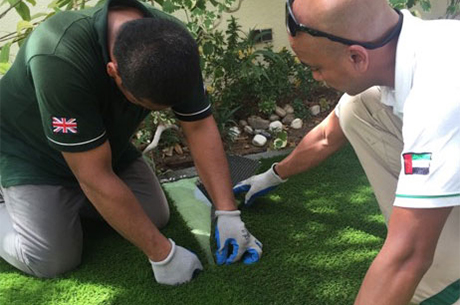
Step 10: Close the Seams
This is where our expertise truly shines. When a seam is closed, it should be around 97% invisible. In ideal conditions, it can disappear almost completely. In most cases, however, if you know exactly where to look, you may still notice it very slightly.
An Easigrass technician carefully inspects the seam for any areas that could be visible before trimming the grass, ensuring a flawless finish. We take the time to refine every seam, making sure the final result meets and exceeds your expectations.
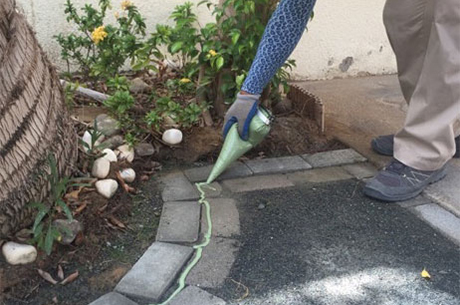
Step 11: Apply Artificial Grass Glue to All Edges
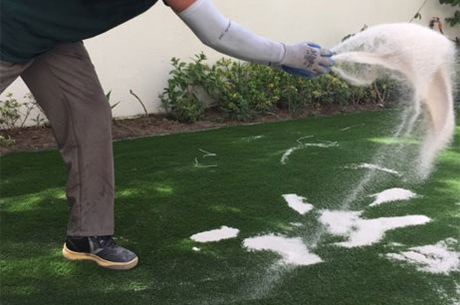
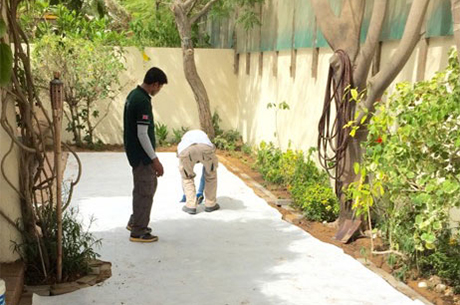
Step 12: Apply the Sand Infill
Once the sand has been applied to the grass, it needs to be massaged into the fibres so that it sinks to the bottom and sits on the backing material. We use a blower and a power brush to complete this step, which helps distribute the silica sand evenly throughout the installation. Once we’re done, you’ll never notice the sand, it’s completely invisible and will remain that way for the lifespan of the grass.
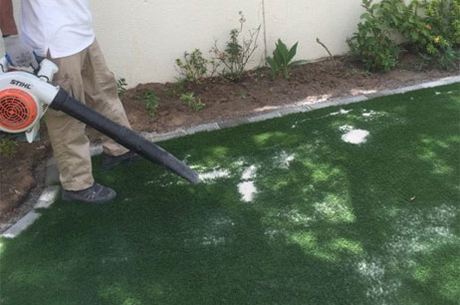
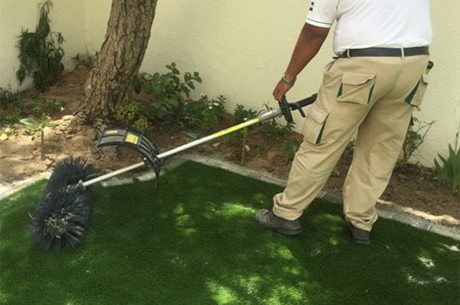
Step 13: Silica Sand Levelling
Once the silica sand is in the grass, we find any areas that feel slightly uneven. Using a blower, we evenly distribute the sand throughout the installation so that the grass feels nice and even underfoot.
Step 14: Clean Up
Lastly, we give the installation a light spray of water followed by a final brush with the power broom, working against the direction of the pile. This removes any dust that may have settled on the artificial grass fibres, leaving the lawn fresh, clean, and glistening in the sunlight. Your artificial lawn is now ready to be used!
The beauty of Easigrass is its quick, simple laying process. A 50 square metre garden can be laid in a single day.
To guarantee the highest quality and finish, we recommend that our artificial grass is installed by our professionally-trained installation teams.
If you’ve been unlucky and your artificial lawn is damaged, just call our team who may be able to carry out some patch repairs.
Every garden is different, but the average size of a domestic garden we install is between 50 and 60 square metres.
The Easigrass team is well-skilled at laying our artificial grass over a diverse range of surfaces, including soil, concrete, brick, wood and even plastic. We’ll devise a solution and make the proper preparations to ensure a seamless laying process, tailored to the surface we are laying on.
Take measurements across the longest and widest points of your area. You will then need to round these measurements up to the nearest metre. Next, multiply the width by the length and this will give you your square metre requirement.
Start your Easigrass Journey
Get in touch to discuss
your project